
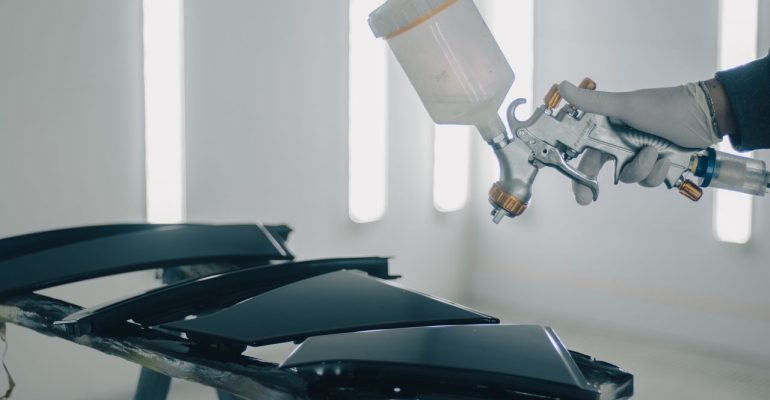
Airbrushing gives you a high level of control over paint, allowing you to create smooth finishes, fine lines, gradients and detailed artwork. However, the quality of the result depends on more than the airbrush itself. A suitable compressor provides the consistent, regulated airflow needed to apply paint evenly without unnecessary pulsing or pressure fluctuations.
For beginners, choosing between the many air compressors for sale can be confusing. Compressors vary considerably in tank size, operating pressure, airflow, noise level and duty cycle. A model that works well for inflating tyres or powering workshop tools may be poorly suited to delicate airbrushing, while a compact airbrush compressor may not provide enough capacity for larger projects.
The good news is that you do not need an industrial compressor to achieve good airbrushing results. By understanding the requirements of your airbrush, the type of paint you intend to use and how frequently you will work, you can select equipment that is practical, reliable and appropriately sized.
Start With the Airbrush You Plan to Use
The airbrush should be the starting point when selecting a compressor. Different airbrushes have different airflow requirements, and manufacturers generally provide recommended operating pressures or airflow specifications.
A gravity-feed detail airbrush, for example, may operate comfortably at relatively low pressure. A larger siphon-feed model can require more airflow, particularly when used continuously. The nozzle size also matters because larger nozzles can accommodate thicker paint and may require different pressure settings.
If you already own an airbrush, check its manufacturer’s instructions before purchasing a compressor. Look for its recommended pressure range and any stated airflow requirement.
If you are buying both items at the same time, choose the compressor based on the most demanding airbrush you expect to use. This provides more flexibility if you later move from small illustrations to larger artwork, models, automotive detailing or other applications.
Understand Pressure and Airflow
Two specifications appear repeatedly when comparing compressors: pressure and airflow. They describe different things and should not be treated as interchangeable.
Pressure, commonly measured in bar or pounds per square inch (PSI), indicates the force available in the compressed air system. Airbrush work generally uses relatively low pressure compared with many workshop applications. Being able to adjust the pressure precisely is therefore more important than simply choosing the compressor with the highest maximum PSI.
Airflow describes how much air the compressor can deliver over a given period. It may be expressed in litres per minute (L/min) or cubic feet per minute (CFM). A compressor with adequate airflow can maintain pressure more effectively during continuous spraying.
A high maximum pressure does not automatically mean that a compressor is better for airbrushing. Fine spraying requires control, consistency and appropriate airflow rather than excessive pressure.
Choose a Compressor With Adjustable Regulation
An adjustable regulator is one of the most useful features for airbrush work. It allows you to control the pressure reaching the airbrush instead of relying on the compressor’s maximum output.
Different paints and applications can require different settings. Fine detail may benefit from lower pressure, while some broader applications may require somewhat more airflow. Paint viscosity, nozzle size and the surface being sprayed also influence the appropriate setting.
A regulator makes these adjustments easier and more repeatable.
Ideally, the compressor should also have a pressure gauge that lets you see the operating pressure. This gives you a reference point when troubleshooting problems such as excessive overspray, poor atomisation or inconsistent coverage.
Consider a Compressor With a Tank
A storage tank is not essential for every airbrush setup, but it can offer several advantages.
Without a tank, the compressor may run whenever air is being used. This can result in more noticeable changes in operation and may cause the motor to run frequently during longer sessions.
A tank stores compressed air so that the airbrush can draw from a reserve. Once the pressure falls below a predetermined level, the compressor switches on to replenish the tank.
For airbrushing, even a relatively modest tank can help provide a smoother supply of air. It can also reduce how frequently the motor needs to operate continuously.
When comparing tank sizes, bigger is not automatically better. A large tank adds weight and takes up more workspace. For occasional hobby airbrushing, a compact compressor with a suitably sized tank may be more practical than a bulky workshop unit.
Think About Noise Before Buying
Noise is easy to overlook when comparing specifications, but it can become important once you start using a compressor regularly.
Airbrushing often involves detailed work that can take considerable time. A loud compressor cycling beside you can become distracting, particularly if you work in a bedroom, studio, hobby room or other shared indoor space.
Oil-free compressors designed specifically for airbrushing are often compact and relatively straightforward to maintain. Some models are built with quieter operation in mind.
However, advertised noise levels should be treated as a guide rather than an absolute guarantee. The surface underneath the compressor, the room’s acoustics and the distance between you and the unit can all affect how loud it seems.
If noise is a major concern, prioritise a compressor designed for quiet operation rather than choosing solely according to maximum pressure.
Check the Duty Cycle
The duty cycle describes how much continuous operating time a compressor is designed to handle within a particular period.
This becomes especially important during longer airbrushing sessions. A small compressor intended for intermittent use may struggle if it is expected to run continuously for extended periods.
Before buying, consider how you normally work.
- Occasional hobby projects may require only short periods of spraying.
- Model painting sessions may involve repeated spraying and pauses.
- Larger artwork or professional work can require considerably longer operating periods.
- Continuous use may justify a compressor designed specifically for heavier workloads.
Allowing the compressor to cool according to the manufacturer’s instructions is important. Do not assume that a compact unit can safely operate indefinitely simply because it produces the required pressure.
Decide Whether Oil-Free Operation Suits You
Oil-free compressors are particularly common in airbrush applications. They avoid the need for lubricating oil inside the compression system and can simplify maintenance.
One major consideration with airbrushing is air cleanliness. Paint application is sensitive to contaminants, and unwanted moisture or oil in the air line can interfere with the finish.
An oil-free compressor can help simplify the system, but it does not eliminate the need for appropriate air treatment. Moisture can still accumulate as air is compressed, especially when the surrounding conditions are humid or when the compressor operates for longer periods.
For this reason, an airbrush setup should generally include suitable moisture control. A moisture trap or filter can help prevent condensed water from reaching the airbrush.
Do Not Ignore Moisture Control
Compressed air can contain moisture from the surrounding atmosphere. When air is compressed and subsequently cools, some of that moisture can condense inside the system.
This can become particularly problematic when spraying paint. Water entering the airbrush can affect the consistency of the spray and potentially spoil an otherwise good finish.
A moisture trap is therefore an important accessory rather than an unnecessary extra. Some compressors include one as part of the regulator assembly, while others may require additional filtration.
Keep the equipment clean and follow the manufacturer’s instructions for draining accumulated moisture. If your compressor has a tank, check its maintenance instructions because stored compressed air can allow condensation to collect inside.
Match the Compressor to Your Working Environment
Size and portability should also influence your decision.
If you have a permanent hobby workstation, a slightly larger compressor with a tank may be convenient. If you need to pack your equipment away after each session, a lightweight unit may be preferable.
Think about where the compressor will be positioned. It needs adequate ventilation and should be placed on a stable surface. Avoid positioning equipment where it can be exposed to excessive dust, moisture or accidental impacts.
The electrical requirements should also be checked before use. Confirm that the compressor is appropriate for your local power supply and follow the manufacturer’s installation and operating instructions.
Avoid Choosing Solely on Price
Price is naturally important, but the cheapest compressor is not necessarily the most economical choice over time.
A low-cost unit may lack useful features such as a regulator, gauge, tank or moisture trap. If you subsequently need to purchase several accessories, the initial saving can disappear.
On the other hand, buying a professional-grade compressor with specifications far beyond your needs can also be unnecessary.
When comparing air compressors for sale, consider the complete setup rather than looking at the compressor price alone. Factor in the regulator, hose, fittings, moisture control and compatibility with your airbrush.
The goal is not to buy the most powerful compressor. It is to buy one that provides the appropriate airflow and controllable pressure consistently.
Check the Hose and Fittings
Compatibility between the compressor and airbrush should be confirmed before purchase.
Airbrush systems can use different hose and fitting sizes. An adapter may be available if the components do not connect directly, but checking compatibility beforehand avoids unnecessary complications.
The hose itself should be suitable for compressed air and appropriate for the pressure involved. A flexible hose can make detailed work easier by reducing resistance and keeping the workspace less cluttered.
Avoid excessively long hoses unless there is a practical reason for using one. Keeping the setup reasonably compact can make pressure management and storage simpler.
Consider Your Paint and Projects
Your intended projects can change what constitutes an appropriate compressor.
Someone painting miniature models may prioritise quiet operation, fine pressure adjustment and portability. An artist working on larger surfaces may place greater importance on airflow and a tank.
Automotive customisation, decorative work and other larger applications can impose different demands again.
Paint type also matters. Thicker paints may require different airbrush settings and nozzle sizes than highly thinned paints. Always follow the paint manufacturer’s safety and application instructions, particularly when working with products that produce airborne vapours or particles.
Good ventilation and appropriate personal protective equipment should be considered whenever spraying coatings, even when using a small hobby airbrush.
A Practical Buying Checklist
Before making a purchase, work through the compressor’s specifications and your intended application.
- Confirm that the compressor can provide the pressure recommended for your airbrush.
- Check that its airflow is suitable for the nozzle and spraying technique you plan to use.
- Look for an adjustable regulator and pressure gauge.
- Consider whether a storage tank would improve consistency and reduce frequent motor cycling.
- Check the stated noise level and duty cycle.
- Confirm hose and fitting compatibility.
- Make sure appropriate moisture control is included or can be added.
- Verify the compressor’s electrical requirements and maintenance instructions.
This approach is more reliable than choosing based on horsepower or maximum pressure alone.
Set Up the System Correctly
Even a good compressor can produce disappointing results if the rest of the system is poorly configured.
Place the compressor on a stable, suitable surface with sufficient ventilation. Connect the regulator, moisture trap and airbrush hose according to the manufacturer’s instructions.
Before spraying paint, test the air supply with the airbrush empty. Check for leaks and confirm that the pressure behaves as expected when the trigger is operated.
Paint should be prepared according to the manufacturer’s recommendations. Avoid making large pressure changes without testing because excessive pressure can cause unwanted overspray, while insufficient pressure may result in poor atomisation.
Cleaning the airbrush after use is equally important. Dried paint can obstruct the nozzle and make it appear as though the compressor is malfunctioning when the real problem is the airbrush itself.
Build for Your Future Needs
It can be tempting to buy equipment based only on the project in front of you. However, a little forward planning can make the setup more useful.
If you expect to experiment with different airbrushes, select a compressor with enough capacity to accommodate your likely future equipment. If your projects are expected to remain small and occasional, there is little reason to purchase a large workshop compressor.
The best choice is ultimately a balance between airflow, pressure control, noise, capacity, reliability, maintenance and price.
A properly matched compressor should fade into the background while you work. It should deliver stable air, allow straightforward pressure adjustment and operate safely within its intended limits. Once those fundamentals are covered, the airbrush itself, the paint preparation and your technique can take centre stage.
For most hobbyists and artists, choosing the right compressor is less about finding the biggest or most powerful machine and more about finding a dependable source of clean, controlled air that suits the way they actually work.